In this project, I combined the IDS and IPS capabilities of Suricata with a Python daemon to act as a firewall and block specific traffic after alerts generate. This consisted of different tools so I will separate them as best I can when explaining them in order.
Suricata Customization
My first step was to download Suricata from the command terminal using apt. There are many different ways to use Suricata but for the purposes of my virtual environment, I felt this way was going to best way for me to utilize it for my learning. I then familiarized myself with the rules and the Suricata.yaml file since I was going to spend a lot of time there for configuration purposes. I used the Suricata user guide a lot to get started as it was very extensive over 2,000 lines long. I won’t flood you with all updated configurations but here are some of the important ones going forward:

First off, we can see the $HOME_NET and $EXTERNAL_NET variables defined. Some rules will use these variables, and to the surprise of no one, the home net variables are the RFC-1918 defined internal non-routable IP addresses. These can be different depending on internal networks so it is very important when initially setting up.
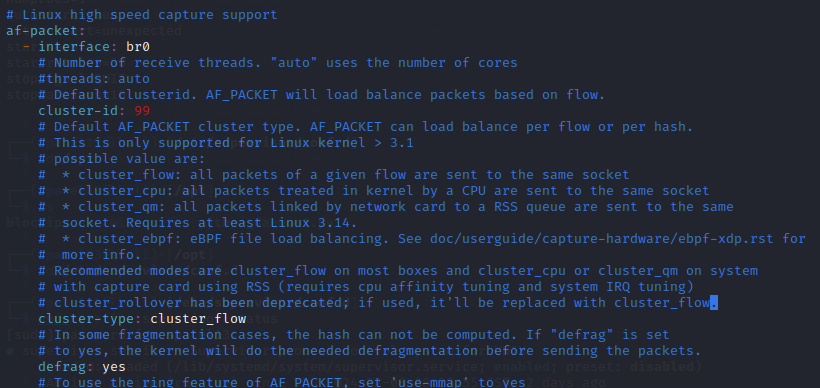
Second, when running out captures using af-packet, having the right interface is essential. I’m currently using a transparent bridge so my interface is br0.
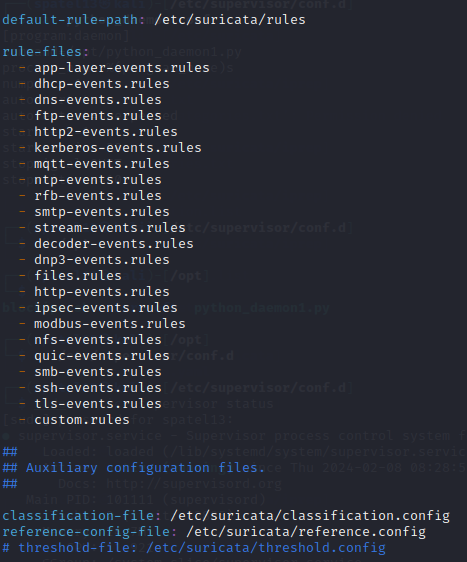
Third, this outlines what rules are going to be parsed. Although most of these are default rules provided by Suricata already, the last line of custom.rules consist of the open rules I made to demonstrate how this can be used with other tools to function as a firewall.
Suricata Custom Rules
Now onto the custom.rules file I created in the rules directory using VIM. Keep in mind, that these rules are used as examples for show. One of them is even a made-up malware name.

- Rule one creates a tcp alert for any traffic traveling out towards 1.1.1.1 which is Cloudfares DNS server over ports 80 and 443 for web traffic. The message seen in the logs would be the “CUSTOM – HTTP traffic to 1.1.1.1 spotted”.
- Rule 2 creates a tcp alert for traffic traveling from any source address to any destination address that spots the word “SKIP”. “SKIP” is a term I used for a fake malware name. If this triggers, the message seen in the logs will be “CUSTOM – SKIP malware suspected”.
- Rule 3 uses iprep and will alert when any system in $HOME_NET acts as a client communicating with any IP in the Custom category whose reputation score is greater than 0. This is explained more below.
Rule 3 contains a rule using iprep which stands for ip reputation. It uses scores on a measure of trust for particular IP addresses. This can be utilized well when dealing with a massive amount of addresses that can be managed manually every second. The IP reputation rules are set with two files name categories.txt and reputation.
The categories file provides a mapping between a category number, short name, and long description. I used 1 for my number, ‘Custom’ for short name, and ‘Custom Blocklist’ for description

The reputation file lists a reputation score for hosts in the categories. The first in the IP adress or subnet, followed by the category number defined in the categories file, and last in the reputation score between 1 and 127.

Running Suricata
Now I will run suricata on my particular interface and visit those addresses on purpose to generate alerts.


As you see, I visited Cloudfares DNS site at 1.1.1.1 which should’ve generated an alert.
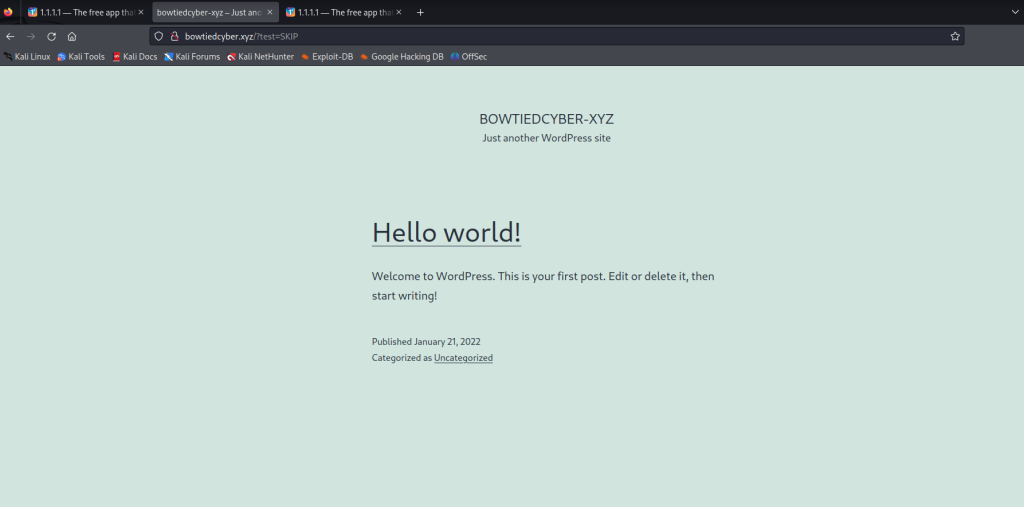
I then visited a site that’s unsecure for the purpose of showcasing. If you look closely at the URL, I entered ‘SKIP’ so that should’ve generated an alert.
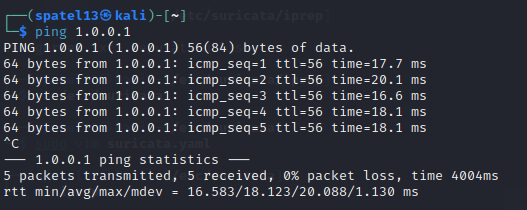
I then used ping on address 1.0.0.1 which is in the subnet I used in the ip rep rules so that should be our third alert.
Suricata Logs

After visiting those sites and stopping the Suricata capture, I opened the fast.log file to see if alerts were generated. Looks like they did, exactly matching the messages created in the rules!
As of now, we’ve detected the alerts but how can I act on them to stop it from happening anymore.
Daemon for Updating IP Tables
The final part that puts this all together is updating the daemon discussed in the last post so that when these alerts are generated, the IP addresses that are threats are added to the IP table to be blocked. Iptables is a firewall program in Linux that contains a set of rules that will filter incoming and outgoing traffic.

Now please understand that it all happens simultaneously but for the purpose of this post, I am splitting it up. As you see above, the iptables are currently empty and this would be before running Suricata or anything.
Now the daemon that is constantly running in the background:
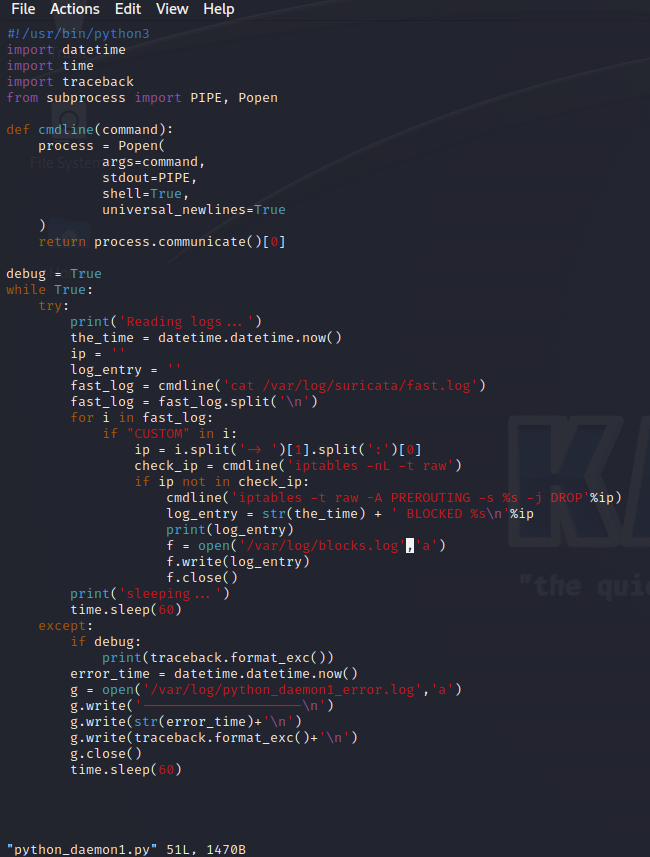
The main components of this script are the:
- cmdline function that lists out the output of any command with new lines. In this case, it is reading out the fast.log file
- for loop that goes through the output and if it sees a ‘CUSTOM’ message in it, then it will find ip address flagged
- If that ip is not in the IP rules table already, it will add it to the table and write it out with the time it was logged. It would then write that out to the blocks.log file
- except loop that would use the debug variable and print out the time of any errors in the python_daemon1_error.log
Below you will see the updates to the iptables rules and the blocks.log output which all align to the script in the daemon.
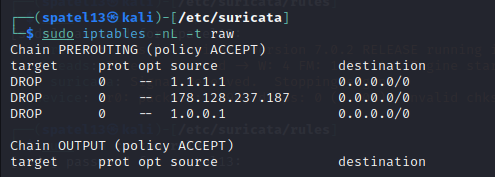

Going forward, I cannot visit or ping request any of those sites as that is running in the background using the daemon, supervisor, and cron manager. This will updated and reran every day.
Thanks for reading!